Welcome!
This lab was created as part of my journey to learn and explore Active Directory, both from an administrative and a security perspective. Inspired by TCM Security’s “Active Directory for Beginners” course, the lab provides a hands-on environment for learning key concepts and testing real-world scenarios — including ethical hacking techniques.
Currently, the lab is running on my VMware setup for ease of testing and development. However, I plan to migrate it to my Proxmox server.
Active Directory Background / Terms
What is Active Directory?
– Its used by Microsoft for Microsoft machines to manage Windows domain networks.
What a domain network?
– Is a collection of machines, servers, printers also included are network objects such as users, groups and systems.
Active Directory Authenticates users Kerberos authentication and that uses tickets.
Active Directory is the most used identify management service.
What is an active directory domain storage?
– This stores AD data such as passwords, names, and phone numbers ( think phone book )
What I Learned from This Lab?
– Setting up AD from scratch.
– Creating a new domain inside a forest.
– Adding new users to AD.
– Adding a file share in AD.
– Setup an SPN Service.
– Created a New Group Policy.
Active Directory Components
Domain Controller Functions
– Host a copy of the active directory domain services
– Provide authentication and authorization services.
– Replicate updates to other domain controllers in the domain and forest
– Allows administrative access to manage user accounts and network resources
Active Directory Data Store
– Contains info about the user such as passwords.
– Contains the Ntds.dit file ( Contains password info )
Logical Components of Active Directory
AD DS Schema
– Think about the rule book.
Two types of Objects:
– Class Object – Objects that can be created in the directory ( User, Computer )
– Attribute Objects – Information that can be attached to an object ( Display Name )
Domains
– They are used to group and mange object in an organization.
Trees
– A domain tree is a hierarchy of domains in AD DS
Forest
– Is a collection of one or more domain tree
Organization Units ( Ous )
– OUs are active directory containers that can contain users groups computers and other OUs
Trust
– It used to again access to resources in another domain ( All domains in a forest must trust other domains in the same forest )
Objects
– What are going to be inside out Organization Unit (OUs)
Examples: Users, Contacts, Groups, Computers, Printers, Shared Folders, and InetOrgPerson
AD LAB Overview
Kali Machine ( attack machine ) x 1
Windows Server 2019 x 1
Windows 10 Enterprise x 2
Lab Setup
Before we begin I do want to say there are certain things done with the lab setup that will open up AD to certain attacks.
We need to get the ISO files for our VMware.
We can go to the following website to get the needed ISO
Windows 2019 Server
https://www.microsoft.com/en-us/evalcenter/evaluate-windows-server-2019
Windows 10 Enterprise
https://www.microsoft.com/en-us/evalcenter/download-windows-10-enterprise
Once Downloaded we are going to create new VMware.
We want to select the windows Server ISO like so.
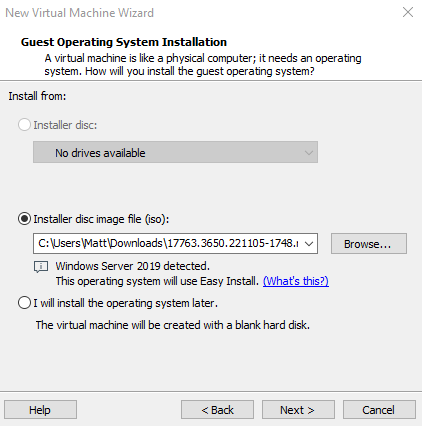
The next screen we are just going to change the Version of windows to install to Windows Server Standard Core.
We will leave Windows product key blank.
If we get a prompt that we left the Windows product key blank just click continue.

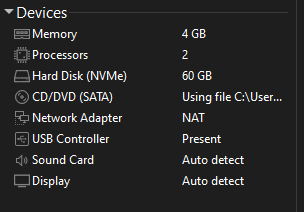
Follow my setup for the configuration for the server.
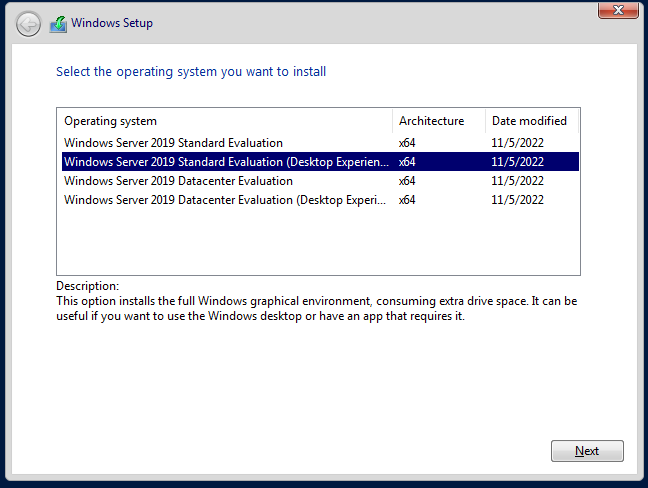
Lets launch our VM and follow the steps I have here.
We are selecting the standard Evaluation Desktop Experience
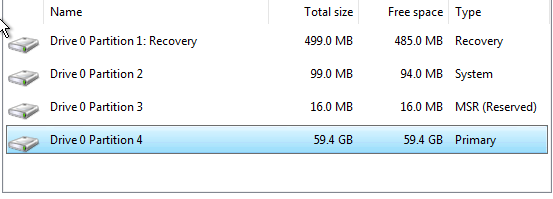
We will be doing a custom install of Windows Server so when we get to the Where do you want to install Windows lets hit “New” and then Apply.
This take a bit to load but once its done we are going to select Drive 0 Partition 4 as shown.
Then we go through the step up process till we get to the screen where it asks us to create a new password.
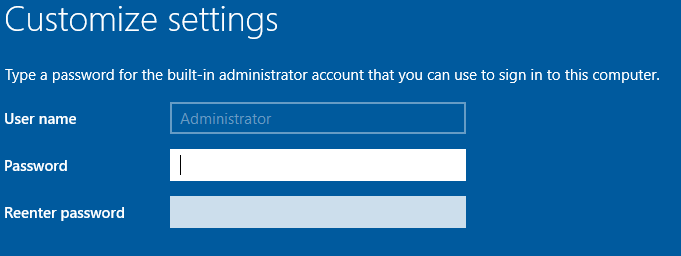
Create what every you would want here.
Once launched lets log in.
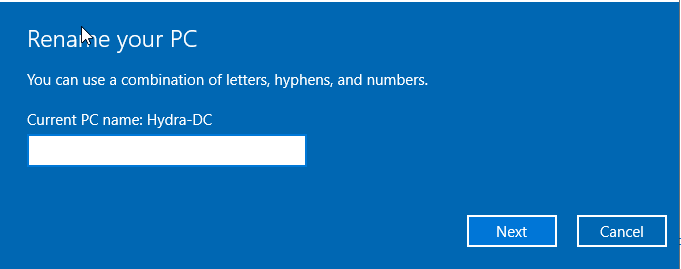
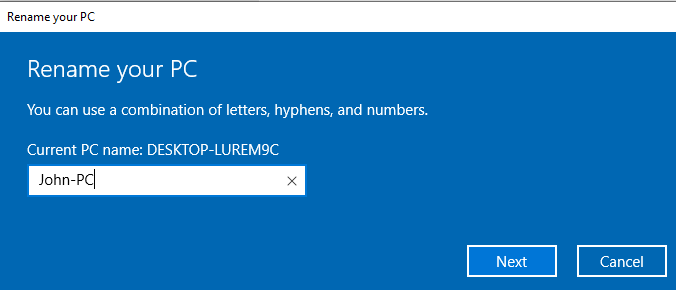
After that we are going to change the computer name.
Start Icon > Type computer > View Pc Name > Rename this PC.
I have already renamed it here but this is what your screen would look like.

Domain Controller
We need to setup the Domain Controller here next.
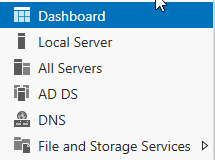
We do this by accessing the Server Manger Dashboard then going into manage and add roles and features.
This is the screen for Server Manager.
This will be the screen for the domain controller.
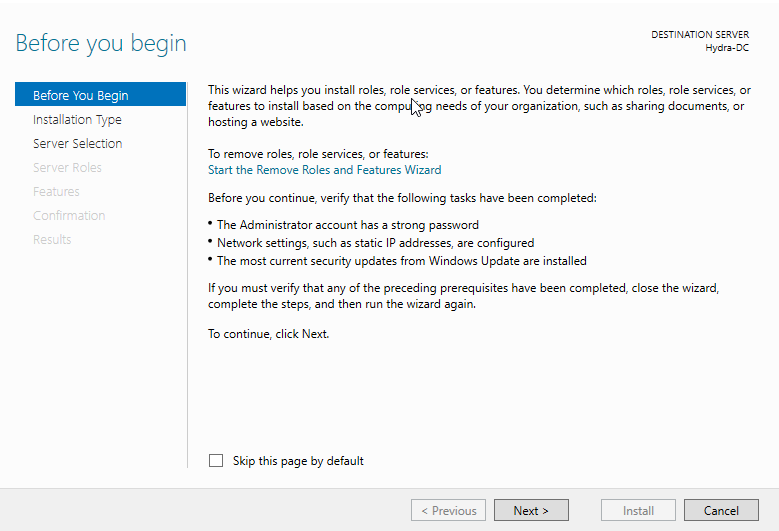
The next couple of screens we are going to just click next on till we get to the screen of Select server roles.
We want to select the option Active Directory Domain Services.
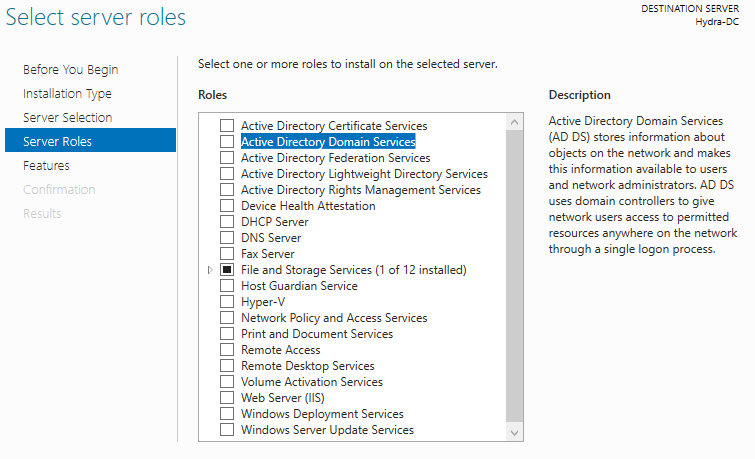
Once we select that we will get a pop up on the screen which we will want to click ” Add Features”.
We can then clicked “Next” till we see an “Install”. We will then install the Domain Controller.
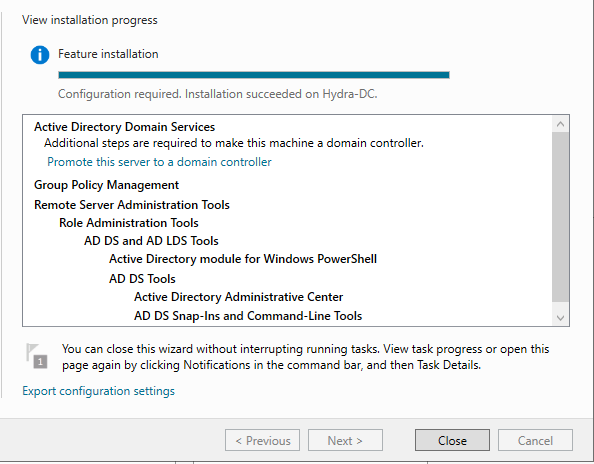
This is what the finished install should look like.
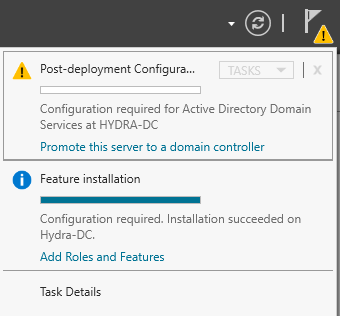
Once we close out of this we will get back to our Server Manger Dashboard. There is a Notification for us to click to Promote this server to a domain controller.
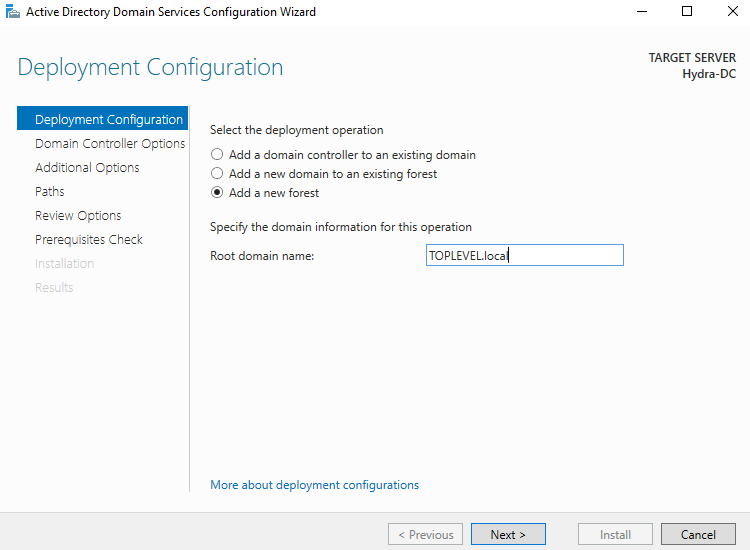
We will be creating a new forest here. We will also be naming it as well. Name it anything you would like. Just remained to add .local to it. Here a photo of how it should look.
On the next page we are going to give it a password. We will continue to click “Next” till we see install, we will click “Install” to finish up the install. This finishes up the Domain Controller, we will need to setup our machine here.
Windows User Machines
We are going to follow the same steps as we did for the Windows server virtual machines. But this time we are selecting the windows 10 ISO and selecting Windows 10 Enterprise for the version of Windows to install.
It will look like this.
We will have the same setup as the Server with 4GB of ram. We also follow the exact same setup for actually installing the windows machine.
We will power on the VM and follow the steps to setting up windows till we get to the following screen.

We would want to click “Domain join instead”. We will want to name the computer, create a password and fill out the security questions, and finish up the remainder of the setup.
Remember we want to do this whole process one more time so we have two user accounts.
We will want to rename the machines again.
Start menu > Computer > View Computer Name > Rename this pc
This complete the setup of our windows machines.
Configuring the Domain
This is where we are going to configure our domain with different things.
We want to focus on Windows Server VM.
On the Server Manager dashboard will will click on tools > Active Directory User and Computers. This will look like so.

If we expand the TOPLEVEL.local will we see Organizational Units.
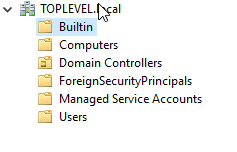
From here we will Right Click > New > Organizational Units > Name it Groups. Will will move everything but the User out of the User folder just too make more organized. The final product looks like this

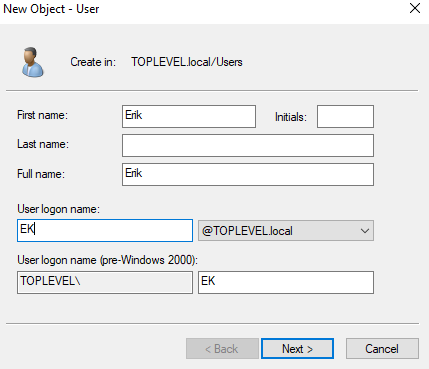
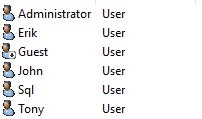
Now we want to add some users here I will be using the same names from our other windows machines. Inside the user folder Right Click > New > User. Fill out the names here and set passwords.
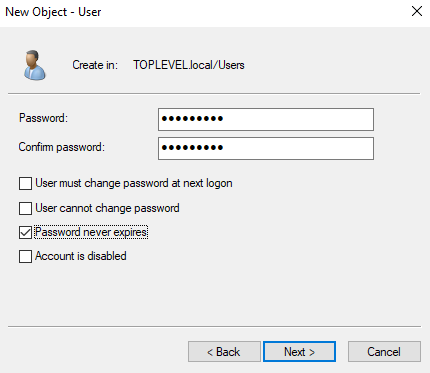
Warning: In a real life situation you NEVER want to leave the password never expires.
We are going to make some extra users here such as a domain admin. We will click copy on the Admin on the top and follow the same steps as we did for the previous user. We will also create a fake SQL account by coping our admin again.
Warning: We never want to leave a SQL service like we did under admin rights. ( I am doing this to convert this into a hacking lab)
This is our end result.
We now will add a file share. Will we be going back to Server Manger and clicking file share.
From that screen will will Click Shares > Task ( Top of screen ) > New Share. We will continue through the process by clicking “Next” and “Create”
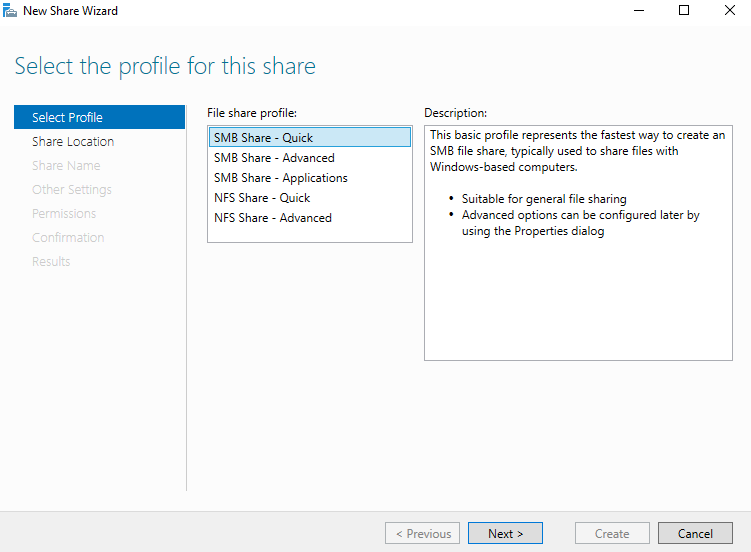
Final product will look like this.

Setting up SPN
I will be setting an SPN for me to attack later on down the line. You can follow these steps if you going to do the same. Open CMD as admin and write the following code and make sure you change it to match your info.

Then we can check if this was successfully configured with a new code

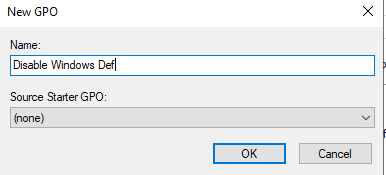
Creating a Group Policy
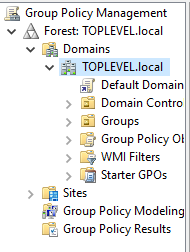
To do this we search for group policy in the search icon > Run as admin. We then can expand Domain and right click it to create new group policy by selecting ” Create a GPO in this domain, and Link it here “
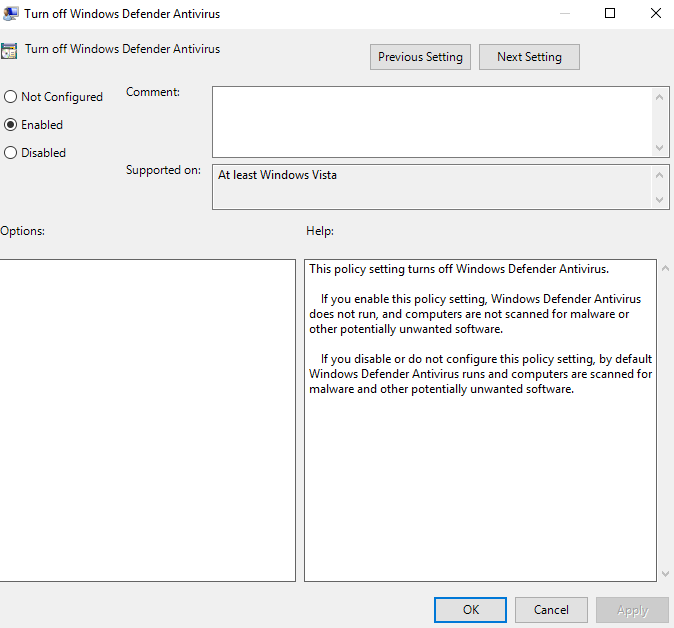
We will be turning off windows defender so that we can learn fundamentals verse trying to evade antivirus. We will do this with our new group policy.
We will click on Disable Window Def > Right Click > Edit > Policies > Administrative templates > Windows Components > Search for windows defender.

We will double click that and then copy my settings.
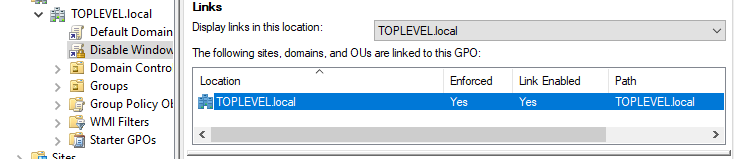
We also want to make sure that this is enforced on this screen here. If it not do a right click and enforce.
Connect Our PC to Our Domain
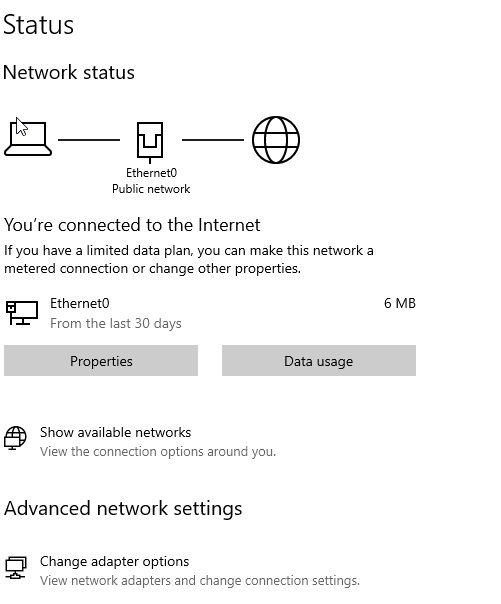
We will switch back over to our other windows machines. We will need our IP from our domain controller. So we open up CMD and run an ipconfig command.

On the Windows machines we will open network and internet settings and change adapter setting
We will then click properties > Then the Ipv4 option which will open a screen like this.
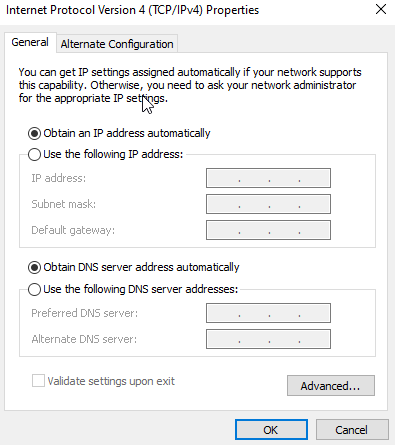
We are going to set the DNS to our Domain Controller IP address. Then we search for domain and this will open up this.
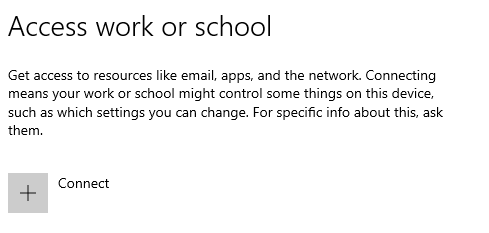
We want to click connect > Join this device to a local Active Directory domain > Enter domain name > Then log into the administrator > Restart
This will bring us back to the sign in screen. We want to click other user and log into the domain

The username is what we set it to be inside the domain controller. I didn’t create the best naming scheme but that okay. We can repeat these steps to sign our other users into the domain.
Congrats! We have finished the AD part of this LAB. I will be adding on the part where we begin to attempt to hack into the machines shortly.